Grapefruit Sea Salt Shampoo Bar

FDEF05E9-2F3C-447A-9BF8-C7970AAF6F94If you have read any of my earlier posts over the past week or so I have been experimenting salt bars and I had this idea to create a Sea Salt shampoo bar.

For this shampoo bar I used Grapefruit Essential oil.  I usually make my shampoo bars in peppermint, tea tree peppermint, lavender, lavender peppermint… etc I am sure you see the pattern of peppermint in my shampoo bars. Then I met  a customer who said she was allergic to peppermint. Allergic to peppermint? It was as though a light bulb went off in my head, an allergy to peppermint,  I have no idea why the possibility had never occurred to me before.  So I used Grapefruit Essential oil for this shampoo bar. (So far the scent is fabulous, hopefully it holds strong)

If you try this recipe out, please be sure to run your recipe through a lye calculator. Always use safe practices when soaping, if you have never made cold process soap, please check out some posts on first time cold process soap making to get all of the details you need for safe soaping.

I used the following ingredients in percentages I do not include lye or water amounts so you can run the recipe or variation through your preferred lye calculator to get the correct lye and water amounts for your soap.

55% coconut oil 76 degree

20% coconut oil fractionated

10% shea butter

8% Avocado oil

5% carrot seed oil

2% Karanja Oil

2 Ounces Of Grapefruit Essential oil

.3 ounces of DL- panthenol

.5 ounces of citric acid

3 tbs of sea salt

lye

distilled water

2 tsp Raspberry Mica

I made this recipe using 48 ounces of oils. 25% superfatted. I usually do 20% superfatted, but thought I would test out 25% since I was adding sea salt to the mix and see what happens.

Side note: I do not usually add color to my shampoo bars, and I am  not sure if I should have used Mica in a shampoo bar, but through all of my research I did not find any statements or advice saying I couldn’t or shouldn’t  use Mica in a shampoo bar,  and since I was experimenting with this recipe anyway why not go all the way.

I added all of my oils together in a double broiler and melted then poured into a larger pot to cool.  Mixed my lye water and added the sea salt. While my oils and lye mixture cooled I mixed 2tsp of raspberry Mica and 2 tbs of fractionated coconut oil together mixed and set aside. Measured out my essential oil. Mixed 4 tbs of distilled water with my DL- panthenol and citric acid and set aside. I checked my oil and water temps when they both  reached around 110 degrees I added the lye water to my oils blending with a stick blender.

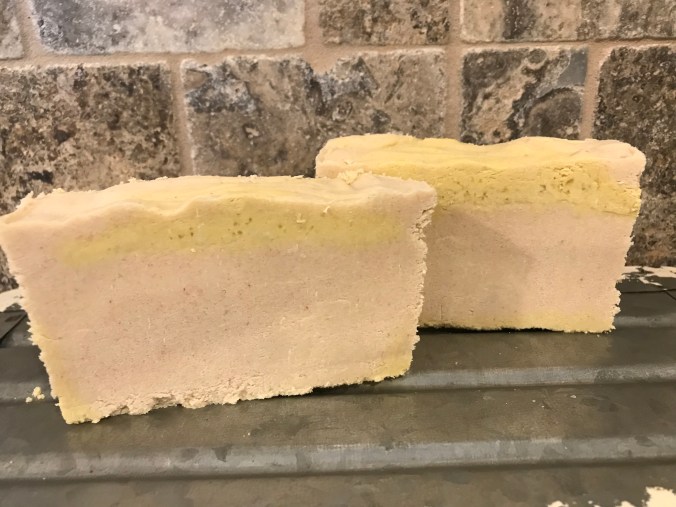
Added my citric and DL-panthenol mixture, then added my essential oil, continued to mix to light trace. Poured about 1/3 into the raspberry Mica container and used a stick blender to blend the color completely and did an in the pot swirl by adding the 1/3 mix back into the pot stirring into the pan slowly being careful not to completely blend the raspberry Mica into the batch.  I poured into a 12 cavity round silicone mold, and a 6 cavity loaf bar mold (only filled 4 of the 6 cavities) I let sit for 24 hours and pressed the soaps out of the mold to continue to cure for 4-6 weeks.

I used a similar recipe, as a salt bar without the DL-panthenol, and citric acid adding 24 ounces of salt at light trace also Grapefruit Essential oil and poured into a 1 3/4  9 cavity Round Ball silicone molds, loved the outcome pictured below, cutest balls of soap.

32C0BEE5-E32F-4C72-BD44-B3BC172096F7

If there are any details you would like from me, or if I have missed adding a step in the post  please let me know. If you have some advice about adding Mica to shampoo bars  I would love to hear it. Not that I plan on making adding Mica to my shampoo bars a habit, but it did make the bar prettier then my usual plain bars I have made in the past.

Advertisement

Expresso Cold Process Bath Bar

2E651CAF-8E37-4CE5-BE52-09E6D2DB24DA

I love the smell of coffee. I do not drink coffee,  by the time I get done adding sugar and cream to a cup of coffee it would be considered a meal calorie wise so I just don’t drink coffee. I do however, love coffee ice cream, and all things scented coffee.

I have made several varieties of coffee soap over the years but this one is my favorite so far…   the longer we soap the more adventurous we become with our recipes, superfatting and oils.

The expresso fragrance oil I used in this recipe I purchased from brambleberry and it just smells absolutely delicious.

This soap uses 64 ounces of oil and I used a 5lb wooden loaf soap mold. If you have never created cold process soap, you may want to start with a simpler recipe. Don’t forget to use PPE when created your soap. I do not give lye and water amounts here, you should always run your recipe through a lye calculator.

3.2 oz.  Almond oil sweet

3.2 oz  Avocado Butter

16 oz    coffee butter

6.4 oz Cocoa Butter

6.4 oz  coconut oil, 76 degree

5.76 oz coconut oil, fractionated

1.92 oz Karanja oil

3.2 oz Shea Butter

3.2 oz Ucuuba Butter

14.72 oz Olive Oil

2 tsp Cappuccino Mica

2 tsp Titanium Dioxide

1tsp super pearly white Mica which I mixed in with the titanium dioxide to give the flat white some pearly color.

3 oz expresso fragrance oil 

3 tbs of coffee grounds

some whole coffee beans for the top of my soap.

4% superfat

after melting down all of my butters and oils. I mixed my lye water and let them both cool down to around 110. Mixed my lye into my oils using a stick blender, added my fragrance oil then separated out 30% to mix with my cappuccino Mica while mixing the other 60% with my titanium dioxide to make the batter a lighter color with all of the dark butters/oils I used.

I mixed the 3 tbs of coffee grounds with the lighter mix and then alternated pouring the lighter mix first, then some of the cappuccino mix and kept going until I was all out of both.  I used a wooden disposable chop stick to swirl the mix at the top of the soap only placing my coffee beans in when I was done. Then covered and waited 24 hours before unmolding and 48 hours before cutting. I like how it came out, I am sure I can perfect the look the next time I make it, it smells so yummy I love it.

If you have any questions or even some suggestions  please feel free to comment. Their is no such thing as bad suggestions or questions.

86874B72-3777-4ED1-A19D-57AAF97D68FE


Eucalyptus Lemongrass Spearmint Salt Bars

B70CF9A6-C8BC-4B8C-BEA5-987DF7C5A8B0

In this recipe I only used 60% coconut oil, and found as you can see in the picture when you zoom in it crumbles a little around the bottom, but I also sprinkled salt in the bottom of the mold which may have contributed to the crumbling. The center of the bars are great, firm no crumbling at all.

This post does not go into the safety measures of cold process soap making, if you have never made cold process soap before please make sure you follow safety precautions when soaping.

This soap used 48oz of oils the percentages and oils used were

60% coconut oil, 76 degree

10% olive oil

10% Ucuuba Butter

10% Shea Butter

10% Avocado Oil

24 ounces of extra fine pink Himalayan sea salt (from SaltWorks)

20% Super fat

2 tsp buttercup Mica from brambleberry dispersed in 2 tbs of Fractionated Coconut Oil

As you can tell from the picture, I did an awful job of blending the colors in this soap. So although not beautiful, or perfect the soap works great. This soap does not dry you out in the shower, or leave you sticky. Overall the soap turned out ok. I think I will try this recipe again using 65-70% coconut oil, maybe take out avocado oil and not adding salt to the bottom of the mold and see if I like it even more. So far I like my Lemon Lime salt Bar recipe best.

If you have any questions/comments or would like to share your ideas, or let me know your thoughts on ways to improve this recipe please let me know I would love to hear from you.


Lemon Lime Cold Process Salt Bars

B2E710EF-E94C-4EF4-8F6D-73C35253CAB7


I made a CP Salt bar for the first time 2 years ago, and loved it.  So as I was standing in my workspace thinking of what to make next I decided maybe it was time to experiment more with salt bars.

This post is may  not be suitable for a first time cold process soap makers, I do not go into details on safety, or temperatures but if you need this information I would be happy to send it you. If you have never made Cold process soap before please make sure you research the safety precautions for soapmaking and working with lye.

If you like using silicone molds Salt Bars are an excellent choice because they just pop out of the mold every time.

I have read how many soap makers like to make their salt bars 90-100% Coconut oil. I usually make mine more like 60-70% Coconut oil but as with almost everything in CP soap making  when it comes to oils it is a preference and it is all up to the maker, you can try just about anything to see what happens, sometimes it may not work out, and sometimes the result are just amazing.

Theses Lemon Lime CP Salt bars smell amazing, and turned out very well. Here is my recipe in percentages,  you can run thru your preferred Lye calculator.

I usually use soapcalc.net/calc/soapcalcwp.asp because they have just about every oil and butter imaginable in their calculator.  I also like Brambleberry’s Lye calculator but it does not have Karanja oil or Ucuuba butter on it which are two ingredients I like to use in many of my soaps.

40 ounces of oils

52.5% Coconut Oil, 76 degree

20% Coconut Oil, Fractionated

17.25% Olive Oil

10.25% Ucuuba Butter

20 ounces of sea salt (I used fine grain Pacific Sea Salt from SaltWorks for this recipe)

2 tsp Kelly Green Mica from Brambleberry dispersered with 2 tbs of fractionated coconut oil.

Once I mixed the oils, lye, Essential oil and got to thin trace, I added the 20 ounces of salt and stirred in slowly making sure the salt was mixed in well.  I poured part (30%) of the soap mix into a glass Pyrex container and mixed with the dispersed Kelly green Mica.

I then poured one color, then the other until all of the molds were filled and used a disposable wooden chop stick to swirl the green into the soap. I let set for about 12 hours and they popped right out of the molds no problems and are pictured at the top.

I used a 12 cavity silicone round soap mold and I still had a little bit of soap left so I poured the remaining into 3 cavity’s of a 6 cavity silicone loaf bar mold.

Wax Paper vs Freezer Paper when creating Cold Process Soap

The first time I made cold process soap in a wooden loaf mold, I did not line it at all and learned that even though you don’t have to line your wooden soap molds, it sure can make your life easier. The second time I used the mold I thought ok let’s try wax paper.

Wax paper works, but it is so thin and it tends to stick to the soap making it very hard to pull it all off of the soap at once. I find myself having to pick tiny little remnants of wax paper out of the corners and it can be quite time consuming making sure you get all of it off your soap. Sometimes I find it easier to just cut off the ends and throw them out or use them at home.

Freezer paper on the other hand, works so  much better. It is a thicker more stable liner for the inside of a wood mold, or other molds you may choose to use. Comes right off of your soap when you un-mold it. I was so excited the first time I tried it.

Some soapers prefer to purchase silicone liners, but I purchase my wooden soap mold from a couple who make them and I can not always find the right size silicone liner to fit inside my wooden loaf mold. I have heard you can make your own silicone mold but I have not tried that yet. Maybe in a future post.

If you ever find yourself in the kitchen about  to make a batch of soap and are trying decide what to line your mold with, pass right by the wax paper and head for the Freezer paper.  I have purchased both name brand and store brand Freezer paper and have great results with both.

If you have used something different please let me know what you have found works well to line your soap molds.


Marcia

Exfoliating Soap Bars

At first I was not sure about exfoliating soap bars. I for one have a really sensitive face, so the thought of using an exfoliating soap bar on my face just seemed harsh.

Of course over time I have learned exfoliants do not have to be harsh, they have some really gentle exfoliants you can add to a bar of soap that will still be wonderful for a sensitive face like my own. For instance JoJoba beads are  not too harsh for the face, oatmeal finely ground, sugar, pumice are all good for use in a facial soap.

I made the soap pictured above, it smells good enough to eat in blueberry/strawberry, and I feel I got a little over zealous with the strawberry and blueberry seeds.  After the soap cured and I went to try it out I saw all of those seeds, and thought no way am I using this on my face.

So after thinking about it for a few minutes I decided to try it out on my legs, I needed to shave and my legs were dry, … so I got into the shower and prepared to use the bar in my legs.

Have you ever ever scratched a bug bite, or your dry arms/legs and you can see the white scratches you are leaving but it feels really good so you just scratch harder? It may just be me, that something weird only I do… but when I used this bar on my legs it felt so good on my dry skin I used it everywhere even my feet, and I feel like I was really scrubbing hard it felt so good on my dry skin and didn’t hurt at all.

Which then got me to thinking why did I think an exfoliating bar has to be for your face? Or even your feet, why not start making exfoliating body bars? Whose body doesn’t need a really good scrubbing every now and then?

Think about it, when your outside doing lawn work, hot sweaty, bug bites, then you can go in the house and get cleaned up with a great exfoliating body bar before settling down on the couch for some tv or making another batch of soap.

Apple Cider Vinegar Peppermint Shampoo Bar

I wanted to make some new shampoo bars, but I was having a hard time figuring out what I wanted to try  next. My fist couple were just your pretty basic shampoo bars, this time I really wanted to do something a little outside the box.

In researching I came across some sites that referenced using Apple cider vinegar in place of distilled water when mixing the lye. Of course I also came across some sites that said do not mix your lye with Apple cider vinegar it will not come out.

So of course I had to try it, right? Right, I had to know for myself if this would work,  so I set out on making a shampoo bar with Apple cider vinegar in place of distilled water. I also wanted to use several hair loving oils, and butters but not the standard shea butter, coco butter, olive oil, coconut oil you usually see.

In general I tend to stay away from short shelf life oils, unless I have a specific recipe I am going to make that requires sunflower, hazelnut, soybean, wheat germ, and walnut oil.  I keep my sweet almond oil refrigerated so it remains good for 1 year.

I used braggs Apple cider vinegar, but if you wanted to try making this soap I would think any Apple cider vinegar would work the same.

I measured out my Apple cider vinegar and lye and set them both to the side. I then measured out my DL Panthenol, water and citric acid, mixed them together then set the mixed solution to the side.

I mixed all of my oils,  and when the oils and lye water were within 10 degrees of each other I poured the lye water into my oils and using a stick blender mixed them together for a minute and added the dl-panthenol and citrus acid mix and blended until I started reaching thin trace and added my peppermint rosemary essential oils. When the batch was ready to pour I poured into (2) 2lb loaf molds, covered and left for apporimately 24 hours before I unmolded.

After 3 days I cut the loafs into bars . Maybe I should have cut after 24 hours, or waited longer not sure which. At first I thought this loaf was going to end up crumbling on me, but it didn’t. After 6 weeks I used it and loved it.

I feel I made this bar work but it does not look amazing, so I will continue to try this different ways to see if I can master making this work and look amazing.  Let me know if you have tried and succeeded.


Strawberry Meadow Cold Process Soap Recipe

This soap turned out so well, I am so proud.  Aren’t we all when we make a soap and we are praying it comes out right and then it turns out it does, that feeling of joy and pride thinking to ourselves “Look what I just did, I am amazing”, okay I may have stretched the amazing part slightly but you know what I mean…..

If you are going to try making this soap, please wear Proper Protective gear, and  whether  you decide to use the oils I did, or you choose to use Your own combination, always run your recipe through a lye calculator.  I did mine 4% superfat

15 ounces  Avocado Oil

5 ounces Castor Oil

16 ounces Cherry Kernel Oil

7 ounces Cocoa Butter

16 ounces Coconut Oil

20 ounces Olive Oil

6 ounces Palm Oil

16 ounces Peach Kernel Oil

16 ounces Rice Bran Oil

2 ounces Tamanu Oil

2 ounces Summer Fling Fragrance Oil

2 ounces Raspberry  Fragrance Oil

2 ounces Strawberry Fragrance Oil

2 tsp of Fired up Fuchsia Colorant  dispersed in 2 tbs of carrier oil

3 tsp of Titanium Dioxide dispersed in  3 tbs of carrier oil

2 tbs of strawberry seeds

This recipe is 119 ounces of Oils & Fats ( you may want to reduce your batch), this made a 10 lb wooden loaf mold. If you reduce the oils just make sure you reduce the amount of Fired up Fuchsia and Titanium Dioxide as well.

I went outside and combined my lye to my distilled water (always lye added to  water NEVER water added to lye), while my lye water cools I will head back inside to the kitchen to mix my oils.

I start warming up my double broiler and weigh out my oils adding them to the double broiler. When all of my oils and butters have melted I turn off my double broiler and remove the top portion so my oils can cool.

While my oils are cooling I mix my Titanium Dioxide and my Fired Up Fuchsia Colorant so they are ready for me to use.  I also divided my Fragrances in to 2 bowls adding 1 ounce of each fragrance to each bowl.

When my oil and Lye are cooled and close in temperature, add the lye to my oils blending the entire time with a stick blender, when I reached light trace I divided my batter into to large bowls.

In the first bowl I added Titanium Dioxide, Blended it in with my stick blender, and then added one of the 3 ounce bowls of fragrance oils and blended until well mixed. I added 75% this mixture to the bottom of my loaf mold.

I then took the second bowl and added my Fired Up Fuchsia , blending with my stick blender until the batter looked very pink, then added my  other bowl of 3 ounce fragrance oils and 2 tbs of strawberry seeds and blended until well mixed and added all of this batter to my mold.

I then took the remaining 25% of the Titanium Batter and poured in my mold. I took a swirling tool (or you can use a butter Knife) and I swirled the knife through the top of  my soap. ( I only really wanted the very top of my soap to be swirled, you can always make yours swirled through the entire loaf. It is one of the awesome factors of making things yourself, you get to decide what you want to do with your creation.

I made this one a little over a week ago, although not ready to use I must say it smells absolutely  amazing.

Calendula Grindelia Robusta Oatmeal Honey Goats Milk Soap

I decided to go on an endeavor today to make a soap that in theory should help with poison ivy, but since I have not tried it, it is just in theory it should help.

I wanted to use Calendula, and Grindelia Robusta for sure but decided To add goats Milk, Manaku Honey, and Oatmeal as well.

Here is what I used.

5 ounces Avocado Oil

4 ounces Castor Oil

20 ounces Coconut Oil

20 ounces Olive Oil

5 ounces Peach Kernel Oil

5 ounces Rice Bran Oil

5 ounces Shea Butter

4 TBS Manaku Honey

4 TBS fine ground oatmeal

1/3 Cup of Powdered Goats Milk

1 ounce Grindelia Robusta Sassafras Hydrosol

Always run your recipe through A lye calculator to find the amount of water & Lye you need. You can always use different oils than I used if you want, just always be sure to run your recipe through a lye calculator. Use proper PPE (Personal Protective Equipment) always.

I took (2) tea mesh strainers and filled with calendula. Filled my double broiler with water and let the tea strainers sit in the broiler for about 90 minutes – 2 hours.

when I felt the calendula tea looked a nice golden yellow color,  I turned the double broiler off and extracted the mesh strainers .  I used a second strainer to pour  my tea over it to get any loose calendula that strayed  out of the tea strainers. I let the tea cool to room temperature,  before measuring out what I needed for my lye. I measured out 1 ounce less then what the recipe called for so I could add 1 ounce of Grindelia Robusta Sassafras Hydrosol.

I then went outside (I have a covered porch, and I always add my lye and water together outside) and added my lye to my Calendula tea and Grindelia Hydrosol water and the water instantly turned a deep dark burnt Red color …

image

I went back inside and measured out and added my oils together and let them cool as I then measured out my goats milk, honey, and ground my oatmeal.

when I felt like everything was ready  I added the goats milk to the oils used my stick blender to blend that altogether,  then I added the oatmeal and last I added the honey. I blended all of this together before I added the lye water.  When everything looked to be pretty mixed in there were no clumps looked pretty smooth I added the lye water and blended to light trace. Ended up a reddish brick color so far.

image

I then poured it into a wooden loaf mold and covered. Now I have to wait a few days to take out of loaf, and 6 weeks before attempting to use.  I will keep you updated.

image

Any statements made have not been evaluated by the FDA. This product is not intended to diagnose, treat, cure, or prevent any disease. It is recommended to test the product on a small area before using. For external use only. Avoid contact with eyes. Discontinue use if irritation occurs.

How I started Candle Making

CandlesIMG_0020 (2)

Like a lot of Woman and Men out in the world, I love candles. When I walk into a store, or walk through a craft show/market and I see candles I can’t help but stop and hardly never walk away without purchasing at least 2 candles. I just love candles.

Now I have known candle purchasers who seem to purchase candles but never burn the candles, I however,  am not that person. I buy a candle,  I go home and  lite one up  letting its amazing fragrance flow through my house almost as soon as I walk in my door.

My mom, like me is also a lover of candles. One night while  I was sitting on my parents couch talking about candles my mom said “Why don’t we just making our own candles?” and I was just looked at her and said “wouldn’t that be difficult, its so much easier to just go buy a candle?” So started our hunt for how to go about making your own candles. We found the process appeared fairly easy as long as you just want to make simple container candles or wax melt cubes.

Off topic for just a moment,  I know on Etsy there is a shop  I just love ran by Michelle Boswell called Home Made Scents, the link to her shop is:  etsy.com/shop/HomemadeScents  . She makes some of the most deliciously edible looking candles that just smell amazing, burn well and make the most awesome gifts for candle lovers everywhere.   I know a little odd for a candle maker to mention another shop that sells candles, but I make simple container candles and wax melt cubes, I do not make Artisian candles like the decorative amazing looking candles you will find at Home Made Scents.

So getting back to how we started, we did several weeks of research on candle wax, candle containers, scents, and Candle Wicks. We ordered some wax, Color chips/and liquid, candle containers, wicks, wick tabs, wick holders and we got started. After trying several different containers we  landed on Mason Jars for our container of choice, and a Hybrid Candle wax ( a mix of Paraffin and Soy). Overall we are very pleased with the Hybrid wax, very simple to use,  burns well,  and holds the scent well.

The most important items needed to begin Candle making are  Thermometer, fragrance or essential oils, Candle Wax, Candle Color Cubes or Liquid, Candle Wicks, Candle Containers, a Double Broiler,  and a metal Pouring container. I would recommend clearing off your kitchen counter of all unnecessary items before getting started and found laying Freezer paper down and lightly taping in place over our Granite counters made clean up a breeze.

To start out fill the bottom of your double broiler with water, place the empty top half of the broiler on top of the water filled bottom half of the broiler. Add your wax and heat your wax up in the top of the  double broiler until it reaches the recommended temperature.

While you are waiting on the wax to reach its desired temperature, now is a good time to add your wicks to your containers, I use wick tabs they make the wick stick to the bottom of your container and keep them in place even after you pour your wax in.

Once the temperature of your candle wax  is met and your containers are ready with the wicks in place, you now want to add color to your wax first if you wish to have a colored candle then add 1.5 ounces of fragrance per pound of wax used,  and stir your candle wax  until you feel the color and scent are all mixed together.

Then pour your wax into your metal pouring container (this makes pouring the wax into the containers you have chosen much easier than trying to pour the wax from the pot) and then pour the wax into your candle containers, straighten your wicks if needed (they also have wick holders available which will help keep your wicks straight while cooling)  and wait for your candles to cool.

Again like Soap making I find the aspect I appreciate most is having complete control over what goes into my candle and what scents I make. I never have a candle made that I won’t burn because I made them all, I love all the scents.  Being a very simple person who loves things that are just plain useful, I don’t really need my candles to be pretty,  just useful.  So that is what my candles are just plain awesome smelling useful candles meant to be used and enjoyed. I especially find I appreciate the odor eliminating scents I have come across that work wonders for the home.

You can see some of my candles here etsy.com/shop/BearsHeadMountain